Wednesday, October 29, 2008
Daring Bakers Challenge - Pizza! Pizza!
~ BASIC PIZZA DOUGH ~
Original recipe taken from “The Bread Baker’s Apprentice” by Peter Reinhart.
Makes 6 pizza crusts (about 9-12 inches/23-30 cm in diameter).
Ingredients:
4 1/2 Cups (20 1/4 ounces/607.5 g) Unbleached high-gluten (%14) bread flour or all purpose flour, chilled - FOR GF: 4 ½ cups GF Flour Blend with xanthan gum or 1 cup brown rice flour, 1 cup corn flour, 1 cup oat flour, 1 ½ cup arrowroot, potato or tapioca starch + 2 tsp xanthan or guar gum
1 3/4 Tsp Salt
1 Tsp Instant yeast - FOR GF use 2 tsp
1/4 Cup (2 ounces/60g) Olive oil or vegetable oil (both optional, but it’s better with)
1 3/4 Cups (14 ounces/420g or 420ml) Water, ice cold (40° F/4.5° C)
1 Tb sugar - FOR GF use agave syrup
Semolina/durum flour or cornmeal for dusting
DAY ONE
Method:
1. Mix together the flour, salt and instant yeast in a big bowl (or in the bowl of your stand mixer).
2. Add the oil, sugar and cold water and mix well (with the help of a large wooden spoon or with the paddle attachment, on low speed) in order to form a sticky ball of dough. On a clean surface, knead for about 5-7 minutes, until the dough is smooth and the ingredients are homogeneously distributed. If it is too wet, add a little flour (not too much, though) and if it is too dry add 1 or 2 teaspoons extra water.
NOTE: If you are using an electric mixer, switch to the dough hook and mix on medium speed for the same amount of time.The dough should clear the sides of the bowl but stick to the bottom of the bowl. If the dough is too wet, sprinkle in a little more flour, so that it clears the sides. If, on the contrary, it clears the bottom of the bowl, dribble in a teaspoon or two of cold water.
The finished dough should be springy, elastic, and sticky, not just tacky, and register 50°-55° F/10°-13° C.
Or
2. FOR GF: Add the oil, sugar or agave syrup and cold water, then mix well (with the help of a large wooden spoon or with the paddle attachment, on low speed) in order to form a sticky ball of dough.
3. Flour a work surface or counter. Line a jelly pan with baking paper/parchment. Lightly oil the paper.
4. With the help of a metal or plastic dough scraper, cut the dough into 6 equal pieces (or larger if you want to make larger pizzas).
NOTE: To avoid the dough from sticking to the scraper, dip the scraper into water between cuts.
5. Sprinkle some flour over the dough. Make sure your hands are dry and then flour them. Gently round each piece into a ball.
NOTE: If the dough sticks to your hands, then dip your hands into the flour again.
6. Transfer the dough balls to the lined jelly pan and mist them generously with spray oil. Slip the pan into plastic bag or enclose in plastic food wrap.
7. Put the pan into the refrigerator and let the dough rest overnight or for up to thee days.
NOTE: You can store the dough balls in a zippered freezer bag if you want to save some of the dough for any future baking. In that case, pour some oil(a few tablespooons only) in a medium bowl and dip each dough ball into the oil, so that it is completely covered in oil. Then put each ball into a separate bag. Store the bags in the freezer for no longer than 3 months. The day before you plan to make pizza, remember to transfer the dough balls from the freezer to the refrigerator.
DAY TWO
8. On the day you plan to eat pizza, exactly 2 hours before you make it, remove the desired number of dough balls from the refrigerator. Dust the counter with flour and spray lightly with oil. Place the dough balls on a floured surface and sprinkle them with flour. Dust your hands with flour and delicately press the dough into disks about 1/2 inch/1.3 cm thick and 5 inches/12.7 cm in diameter. Sprinkle with flour and mist with oil. Loosely cover the dough rounds with plastic wrap and then allow to rest for 2 hours.
Or
8. FOR GF: On the day you plan to eat pizza, exactly 2 hours before you make it, remove the number of desired dough balls from the refrigerator. Place on a sheet of parchment paper and sprinkle with a gluten free flour. Delicately press the dough into disks about ½ inch/1.3 cm thick and 5 inches/12.7 cm in diameter. Sprinkle the dough with flour, mist it again with spray oil. Lightly cover the dough round with a sheet of parchment paper and allow to rest for 2 hours.
9. At least 45 minutes before making the pizza, place a baking stone on the lower third of the oven. Preheat the oven as hot as possible (500° F/260° C).
NOTE: If you do not have a baking stone, then use the back of a jelly pan. Do not preheat the pan.
10. Generously sprinkle the back of a jelly pan with semolina/durum flour or cornmeal. Flour your hands (palms, backs and knuckles). Take 1 piece of dough by lifting it with a pastry scraper. Lay the dough across your fists in a very delicate way and carefully stretch it by bouncing it in a circular motion on your hands, and by giving it a little stretch with each bounce. Once the dough has expanded outward, move to a full toss.
Or
10. FOR GF: Press the dough into the shape you want (about 9-12 inches/23-30 cm in diameter - for a 6 ounces/180g piece of dough).
NOTE: Make only one pizza at a time.
During the tossing process, if the dough tends to stick to your hands, lay it down on the floured counter and reflour your hands, then continue the tossing and shaping.
In case you would be having trouble tossing the dough or if the dough never wants to expand and always springs back, let it rest for approximately 5-20 minutes in order for the gluten to relax fully,then try again.
You can also resort to using a rolling pin, although it isn’t as effective as the toss method.
11. When the dough has the shape you want (about 9-12 inches/23-30 cm in diameter - for a 6 ounces/180g piece of dough), place it on the back of the jelly pan, making sure there is enough semolina/durum flour or cornmeal to allow it to slide and not stick to the pan.
Or
11. FOR GF: Lightly top it with sweet or savory toppings of your choice.
12. Lightly top it with sweet or savory toppings of your choice.
Or
12. FOR GF: Place the garnished pizza on the parchment paper onto the stone in the oven or bake directly on the jelly pan. Close the door and bake for about 5-8 minutes.
NOTE: Remember that the best pizzas are topped not too generously. No more than 3 or 4 toppings (including sauce and cheese) are sufficient.
13. Slide the garnished pizza onto the stone in the oven or bake directly on the jelly pan. Close the door and bake for abour 5-8 minutes.
Or
13. FOR GF: Follow the notes for this step.
NOTE: After 2 minutes baking, take a peek. For an even baking, rotate 180°.
If the top gets done before the bottom, you will need to move the stone or jelly pane to a lower shelf before the next round. On the contrary, if the bottom crisps before the cheese caramelizes, then you will need to raise the stone or jelly.
14. Take the pizza out of the oven and transfer it to a cutting board or your plate. In order to allow the cheese to set a little, wait 3-5 minutes before slicing or serving.
Thanks for listening to me gab and I hope you enjoy this recipe and you will try it at home!
Sunday, September 28, 2008
Daring Bakers Challenge: Lavash Crackers
(I'm a day late on this one - so much for "auto post" and on top of all that it posts the wrong one! This is the correct version.)
It's September and it's time for the Daring Bakers Challenge! The challenge was brought to us by Natalie from Gluten A Go Go, and co-host Shel, of Musings From the Fishbowl. This month we have Lavash Crackers from one of my bread baking bibles The Bread Bakers Apprentice. Lavash crackers are extremely versatile and can be made savory or sweet. We were given a ton of "wiggle" room this month with more emphasis on the dip then the cracker. The lovely Mrs. Tablebread even got in on the fun and made the vegan friendly dip: Apple Butter!
Also, for some of you long time readers. This is the month that I meant to re-earn my DB stripes. I meant to come out really punching on this one to show I was back in the game but of course life happened again. Midterms and work came barging in all month so I was only able to make one batch of these crackers (Ok, two but one didn't rise because my kitchen was too cold! SHHHH).
I hope you enjoy this month's challenge and don't forget to stop over and see all the other amazing crackers - there are some truly artistic bakers going crazy out there! Check us out: Daring Bakers.
Here's a simple formula for making snappy Armenian-style crackers, perfect for breadbaskets, company and kids...It is similar to the many other Middle Eastern and Northern African flatbreads known by different names, such as mankoush or mannaeesh (Lebanese), barbari (Iranian), khoubiz or khobz (Arabian), aiysh (Egyptian), kesret and mella (Tunisian), pide or pita (Turkish), and pideh (Armenian). The main difference between these breads is either how thick or thin the dough is rolled out, or the type of oven in which they are baked (or on which they are baked, as many of these breads are cooked on stones or red-hot pans with a convex surface)...
The key to a crisp lavash,...is to roll out the dough paper-thin. The sheet can be cut into crackers in advance or snapped into shards after baking. The shards make a nice presentation when arranged in baskets.
Makes 1 sheet pan of crackers
* 1 1/2 cups (6.75 oz) unbleached bread flour or gluten free flour blend (If you use a blend without xanthan gum, add 1 tsp xanthan or guar gum to the recipe)
* 1/2 tsp (.13 oz) salt
* 1/2 tsp (.055 oz) instant yeast
* 1 Tb (.75 oz) agave syrup or sugar
* 1 Tb (.5 oz) vegetable oil
* 1/3 to 1/2 cup + 2 Tb (3 to 4 oz) water, at room temperature
* Poppy seeds, sesame seeds, paprika, cumin seeds, caraway seeds, or kosher salt for toppings
1. In a mixing bowl, stir together the flour, salt yeast, agave, oil, and just enough water to bring everything together into a ball. You may not need the full 1/2 cup + 2 Tb of water, but be prepared to use it all if needed.
2. For Non Gluten Free Cracker Dough: Sprinkle some flour on the counter and transfer the dough to the counter. Knead for about 10 minutes, or until the ingredients are evenly distributed.
The dough should be firmer than French bread dough, but not quite as firm as bagel dough (what I call medium-firm dough), satiny to the touch, not tacky, and supple enough to stretch when pulled. Lightly oil a bowl and transfer the dough to the bowl, rolling it around to coat it with oil. Cover the bowl with plastic wrap.
or
3. For Gluten Free Cracker Dough: The dough should be firmer than French bread dough, but not quite as firm as bagel dough (what I call medium-firm dough), and slightly tacky. Lightly oil a bowl and transfer the dough to the bowl, rolling it around to coat it with oil. Cover the bowl with plastic wrap.
4. Ferment at room temperature for 90 minutes, or until the dough doubles in size. (You can also retard the dough overnight in the refrigerator immediately after kneading or mixing).
5. For Non Gluten Free Cracker Dough: Mist the counter lightly with spray oil and transfer the dough to the counter. Press the dough into a square with your hand and dust the top of the dough lightly with flour. Roll it out with a rolling pin into a paper thin sheet about 15 inches by 12 inches. You may have to stop from time to time so that the gluten can relax. At these times, lift the dough from the counter and wave it a little, and then lay it back down. Cover it with a towel or plastic wrap while it relaxes. When it is the desired thinness, let the dough relax for 5 minutes. Line a sheet pan with baking parchment. Carefully lift the sheet of dough and lay it on the parchment. If it overlaps the edge of the pan, snip off the excess with scissors.
or
3. For Gluten Free Cracker Dough: Lay out two sheets of parchment paper. Divide the cracker dough in half and then sandwich the dough between the two sheets of parchment. Roll out the dough until it is a paper thin sheet about 15 inches by 12 inches. Slowly peel away the top layer of parchment paper. Then set the bottom layer of parchment paper with the cracker dough on it onto a baking sheet.
4. Preheat the oven to 350 degrees Fahrenheit with the oven rack on the middle shelf. Mist the top of the dough with water and sprinkle a covering of seeds or spices on the dough (such as alternating rows of poppy seeds, sesame seeds, paprika, cumin seeds, caraway seeds, kosher or pretzel salt, etc.) Be careful with spices and salt - a little goes a long way. If you want to precut the cracker, use a pizza cutter (rolling blade) and cut diamonds or rectangles in the dough. You do not need to separate the pieces, as they will snap apart after baking. If you want to make shards, bake the sheet of dough without cutting it first.
5. Bake for 15 to 20 minutes, or until the crackers begin to brown evenly across the top (the time will depend on how thinly and evenly you rolled the dough).
6. When the crackers are baked, remove the pan from the oven and let them cool in the pan for about 10 minutes. You can then snap them apart or snap off shards and serve.
Lewis Note: Due to technical difficulties photos and Apple Butter recipe will follow in a couple of days. I thought that I had them in the post but realized at the last minute that they were there and my camera is not cooperating. Thank you for your understanding. I have to go back to pulling my hair out!
Monday, September 22, 2008
White Bread - Baguettes
Are you enjoying our wonderful trip down white bread lane? Hopefully by now the idea of making homemade bread is starting to not scare you as much. Bread baking is as much about “Just Do It” as it is about getting something “right”.
Do not worry about getting your shape exactly correct or cutting your Epi perfectly (should you choose to go that route). The idea here at The Table is to always have fun and just get in the kitchen! The exhilaration, the feeling of accomplishment, the joy! GET IN THERE AND BAKE SOME BREAD!!! :)
Richard Bertinet has definitely created some keepers in his book Dough. This white bread dough is so versatile and we haven’t even begun to scratch the surface of what this dough can be turned into! I firmly believe that once you use this recipe it will quickly become your ‘go-to’ recipe for bread in a pinch!
(From Dough by Richard Bertinet)
To Prepare:
Line a baking tray with a lightly floured lint-free dishtowel.
To Make:
- With the help of the rounded end of your scraper, turn the dough out onto a floured counter. Using the sharp side of your scraper cut it into 4 pieces (weighing about 8 ounces each) if you are making full-sized baguettes or8 (weighing about 4 ounces each) for the mini baguettes. Roll each piece into a ball and let them rest for another 5 minutes.
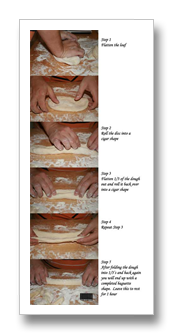
- Lightly dust the counter with flour. To mold the baguettes, take the first ball, turn it rounded side down and then flatten it with the heel of your hand into a rough oval shape. Fold one side of your flattened dough into the middle and again use the heel of your hand, or thumb, to press it down and seal. Bring the other side over to the middle and again press down to seal. By folding and pressing in this way, you give the dough some extra strength down the spine of the baguette. Finally, fold in half lengthwise and seal the edges so you end up with a long log shape. Roll each baguette a little to shape and extend it to the length of your towel-lined baking tray. Repeat with the other balls of dough.
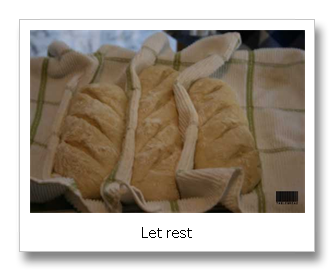
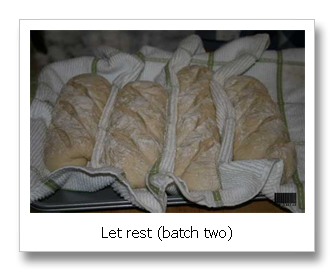
- Lay the baguettes on the towel on your baking tray, making a pleat in the towel between each one (to stop them touching as they rise). Cover with another towel and let rise for 45-60 minutes, or until they have nearly doubled in volume.
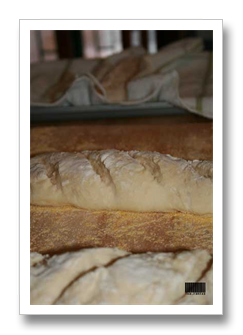
- Transfer the baguettes to a very lightly floured wooden peel or flat-edged cooking sheet. Using a razor blade or sharp knife, make 5 or 6 diagonal cuts across the top of the baguette. Make the cuts swiftly and cleanly, taking care not to drag the dough.
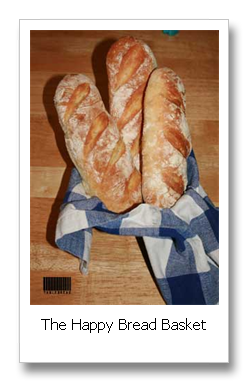
- The crust on your baguettes will be crunchier if you bake them with a little steam, so mist the inside of the preheated oven using a water spray just before putting them in. Slide them onto your baking stone or tray in the oven. Spray again with water just before closing the door and bake for 10 – 12 minutes until the crust is a nice deep golden color. (Once you have closed the door , do not open it for the first 4-5 minutes so that you maintain the heat needed to form the crust.)
Variation: Epis
Follow the method for baguettes up to the point of laying the bread on a lightly floured flat baking tray. With a pair of scissors, held at a 45 degree angle to the dough, start at one end of the baguette and make snips (cutting three quarters of the way through the dough) at intervals all the way down the center. This will create “V” shaped points of dough which you can push to alternate sides of the bread, so that it looks like a wheat sheaf. Bake, with steam (as above), for 10 – 12 minutes.
I hope you’ve enjoyed our trip down white bread lane. This is the first of my focused dough type trips. Stay tuned for wheat bread, wet dough, quick breads, and many more!
Do you have a special request or even a question about something you ate and really enjoyed? Do you know of a bread recipe but you’re a little timid to try it out?
Throw them at me in the comments and we will work through them together!
Thursday, September 18, 2008
White Bread - Fougasse
Wow - I bet you thought I forgot about that dough you have sitting in the refrigerator waiting to be shaped into wonderful loaves of deliciousness!
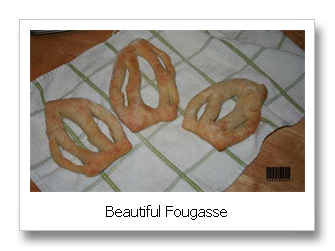
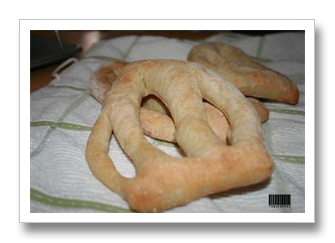
Your patience was well worth it; I introduce you to the Fougasse. This cut has a long and varied history. I will focus on the Italian tradition of fougasse. The old Italian bakers used to use these small cut pieces of dough to test the temperature of the bread ovens. They would determine how hot the oven is based on the time the dough took to cook.
This was my first time to make a go at the fougasse cut. This turned our white bread dough recipe into the most fabulous pretzel like texture and taste you've ever had! This definitely became a new family favorite. If you are looking for a healthy, homemade road trip safe food this is your ticket to success. The personal size of these pieces make them perfect for traveling or just sitting in front of the computer.
(from Dough by Richard Bertinet)
Instructions:
- Make up a batch of the white bread dough
- Flour the counter well. Use the rounded end of your plastic scraper to release the dough from the bowl, so that you can scoop it out easily in one piece and transfer it to the counter without stretching it. Be careful not to deflate the dough when handling it but let it spread out to cover a square of the counter. Generously flour the top of the dough, cover with a lint free dishtowel,and let rest for another 5 minutes.
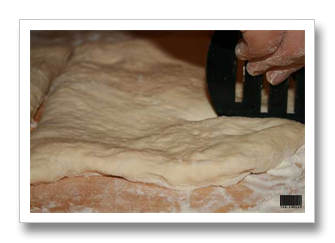
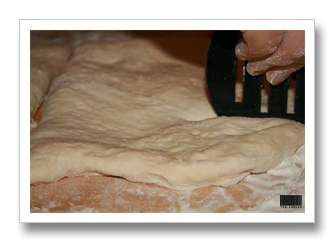
- Using the flat edge of your scraper, cut the dough into two rectangles and then cut each piece again into three roughly rectangular pieces. Again handle the dough as gently as you can so that it stays as light and full of air as possible. Keep the pieces well floured.
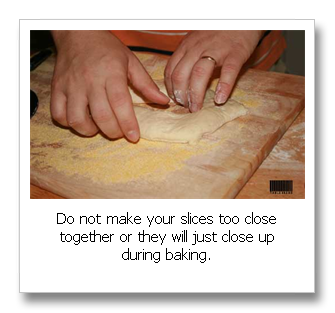
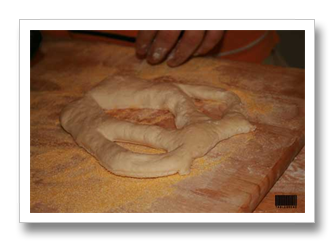
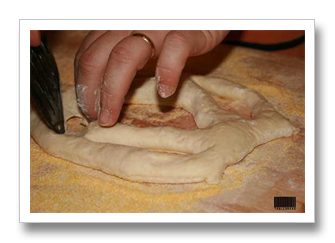
- Take one of the pieces of dough and use the flat edge of your scraper to make a large diagonal cut across the center, making sure that you don't go right to the edges of the dough, but cut all the way through the dough onto your counter. Then make three smaller diagonal cuts fanning out on each side of the central one. Put your fingers into the slits and gently open them out of form holes.
- Lift onto a lightly floured wooden peel or flat-edged baking tray and from here, slide onto the hot baking stone or upturned tray in the preheated oven. Do this as quickly as possible to avoid letting heat out of the oven. Using a water spray, mist the inside of the oven with water just before closing the door. Turn the heat down to 450F (230C) and bake for 10-12 minutes until golden brown.
Lewis Note: A flat plastic spatula works just as well as an expensive dough scraper!
What types of dips (if any) would you eat this with? Butter? Salt? Chocolate?
Tell us all about your preferences!
Tuesday, September 16, 2008
The Martha Blog
Stop by and check her out and then drop back in and let us know what you think!
http://www.themarthablog.com/
I look forward to hearing your reviews.
Thursday, September 11, 2008
2008 James Beard Awards
"To celebrate, preserve, and nurture America’s culinary heritage and diversity in order to elevate the appreciation of our culinary excellence."
Below is the list of the 2008 James Beard awards. I was especially happy to see that Peter Reinhart's Whole Grain Breads: New Techniques, Extraordinary Flavor. This is one of my favorite bread books in existence. Peter Reinhart's books will take you to an all new level of bread understanding. LONG LIVE PETER REINHART! (Ok, I'm done now)
I think it's pretty obvious that there are no losers here. Each category has three nominees with the winner being awarded the James Beard medal. I have also included their pictures because sometimes it's easy for these artisans to become faceless names.
(Source: James Beard 2008 Awards List)
Baking and Desserts
A Baker's Odyssey
by Greg Patent
(John Wiley & Sons)
Award Winner
Peter Reinhart's Whole Grain Breads: New Techniques, Extraordinary Flavor
by Peter Reinhart
Pure Dessert
by Alice Medrich
(Artisan)
INTERNATIONAL
Award Winner
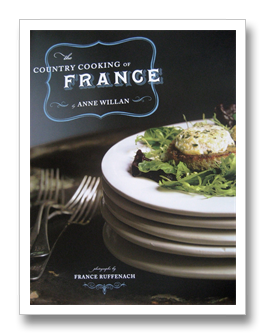
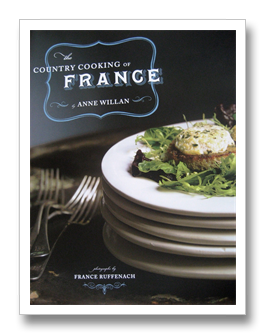
The Country Cooking of France
by Anne Willan
(Chronicle Books)
Lidia's Italy: 140 Simple and Delicious Recipes from the Ten Places in Italy Lidia Loves Most
by Lidia Matticchio Bastianich and Tanya Bastianich Manuali
(Alfred A. Knopf)
Two Meatballs in the Italian Kitchen
by Pino Luongo and Mark Strausman
(Artisan)
WRITING ON FOOD
American Food Writing: An Anthology with Classic Recipes
edited by Molly O'Neill
(The Library of America)
Award Winner
Animal, Vegetable, Miracle: A Year of Food Life
by Barbara Kingsolver
(HarperCollins Publishers)
Rethinking Thin: The New Science of Weight Loss-and the Myths and Realities of Dieting by Gina Kolata
PHOTOGRAPHY
Award Winner
The Country Cooking of France
Photographer: France Ruffenach
(Chronicle Books)
Crust
Photographer: Jean Cazals
(Kyle Books)
Egg
Photographer: Grant Symon
(Éditions Flammarion)
WEBSITE FOCUSING ON FOOD, BEVERAGE, RESTAURANT, OR NUTRITION
Chow.com
Jane Goldman
Award Winner
Epicurious.com
Tanya Steel
Starchefs.com
Antoinette F. Bruno
TELEVISION FOOD SPECIAL
Bocuse d'Or 2007
Network: Shaw Cable, Victoria, BC, Canada
Producer: Nick Versteeg
Foods of Chicago: A Delicious History
Host: Geoffrey Baer
Network: WTTW
Producer: Dan Protess
Award Winner
Top Chef Holiday Special
Hosts: Tom Colicchio and Padma Lakshmi
Network: Bravo
Producers: Andy Cohen, Dave Serwatka, Frances Berwick, Shauna Minoprio, Dan Cutforth, and Jane Lipsitz
TELEVISION FOOD SHOW, NATIONAL AND LOCAL
The Best Recipes in the World with Mark Bittman
Host: Mark Bittman
Network: American Public Television
Producer: Charlie Pinsky
Award Winner
Gourmet's Diary of a Foodie
Network: American Public Television
Producers: Ruth Reichl, Laurie Donnelly, Lydia Tenaglia, Chris Collins, Giulio Capua, and Robert Curran
Top Chef Season 3
Hosts: Tom Colicchio and Padma Lakshmi
Network: Bravo
Producers: Andy Cohen, Dave Serwatka, Frances Berwick, Shauna Minoprio, Dan Cutforth, and Jane Lipsitz
WEBCAST
Obsessives: Innard Workings
www.chow.com
Producers: Meredith Arthur and Eric Slatkin
Spatulatta
Host: Olivia Gerasole and Isabella Gerasole
www.spatulatta.com
Producers: Gaylon Emerzian and Heidi Umbhau
Award Winner
Stewards of the Land
Hosts: Jay Selman, Brian Clark and Eric Anderson
Producers: Mark Ryan and Jay Selman
OUTSTANDING PASTRY CHEF AWARD
Gina DePalma
Babbo Ristorante e Enoteca
NYC
Pichet Ong
P*ONG, NYC
Nicole Plue
Redd, Yountville, CA
Award Winner
Elisabeth Prueitt and Chad Robertson
Tartine Bakery
San Francisco
Mindy Segal
HotChocolate
Chicago
...and for the final category...
Who's Who of Food & Beverage in America
There were several people listed in this category but we found one to be the most interesting:
Steve Sullivan
Founder/Owner, Acme Bread Company, Berkeley, CA
The fact that a bread baker is making the "Who's Who" in the James Beard world shows how artisan bread and their creators are starting to earn their day in the spotlight.
I hope you enjoyed this rundown of the 2008 James Beard Awards. Make sure to tune in for the 2009 Awards in March!
Do you have any of these books by the awarded Chef's or Authors? Do regularly visit any of the awarded websites?
Tell us all about your experiences!